Thursday, September 6, 2018

Lesson 3B – Slide Fonts

Slide Fonts
Use the right fonts for your purpose. Usually this means sans serif fonts for your slides.

Some of the best sans serif fonts for presentations are:

  • Helvetica
  • Gill Sans
  • Arial
  • Futura
  • Optima
  • Rockwell

You can rewatch the slideshow below.


Lesson 3A – PUNCH and Sticky Endings

PUNCH
PUNCH is an acronym to help you start presentations well.

  • Personal – make it personal
  • Unexpected – reveal something unexpected
  • Novel – Show or tell something novel (new)
  • Challenging – Challenge conventional wisdom or audience assumptions
  • Humorous – Use humor to engage your audience with a laugh.

Presentation expert Garr Reynolds has written on his blog and his book The Naked Presenter about starting your presentations well. He says this is necessary because of the primacy effect, that is, how what people hear at the beginning has the biggest impact on how effective your presentation will be.

Read more about PUNCH on his blog:
PUNCH on the Presentation Zen Blog


Make your ending sticky
Here are some suggestions for making your ending sticky. Being sticky means that your ideas will stick and be easy to remember. The idea comes from a book by Chip and Dan Heath, Made to Stick. Garr Reynolds in his book The Naked Presenter refers to their ideas when suggesting how to finish your presentation strong.

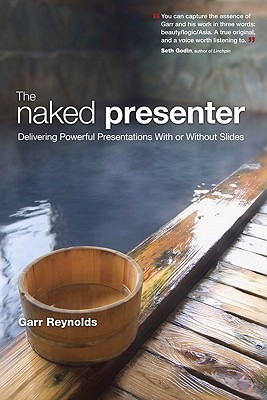
Here is a summary of the points Reynolds shares from the Heaths' book:
  • Simplicity – do not add much new information at the end of your talk.
  • Unexpectedness – just as your PUNCH can include something unexpected, your ending can as well. In fact, you begin an anecdote or a question in your introduction and give the conclusion here.
  • Concreteness – Avoid being abstract. Give a specific example or use a specific image to make your final point.
  • Credibility – Use a final example or statistic to make your final point.
  • Emotions – Find a way to make your audience care about your final point. This can be similar to the Personal part of PUNCH.
  • Stories – Use a story to help your audience remember your talk. People like stories.

Just like with PUNCH, you probably cannot use each of these ideas. But, consider using one or more.


Handling Q & A
Here are some tips for handling the question and answer time (also from The Naked Presenter).

  • Be engaging – Keep your energy level high. Consider getting physically closer to your audience members and look them in the eyes.
  • Be brief – Keep your answers to the questions short. Don't give a second presentation during this time.
  • Be silent – Let your audience member finish their question even if you think you know what they want to ask.
  • Be gracious – If your audience member is annoying you, continue to remain calm and kind.
  • Be assertive – Even though you are being patient and kind, do not let an audience member to take too much time from the rest of the audience.
  • Repeat or rephrase the question – This shows consideration to the full audience who may not have heard the question. Reynolds says this is a "pro tip", an action that shows your skill.
  • Know when to stop – When your time limit is approaching, do not continue to go on speaking. Or, if someone has a question and you know you will not have enough time to answer, take control. You can say something like, "I'm sorry, we are running out of time. You can come speak to me after the presentation."

Finally, end the Q&A time with about 1 minute or so left in your time and close powerfully with your main point. One way to do so is to say something like:
If you only remember one thing today, remember that …Thank you.

Lesson 2 – Graphs

Task 1
Update your graph slides (4 of them). 

Use the information you learned from the lecture including:
  • Use the right graph for your data.
  • Don't use random order for your bars or (pie) slices.
  • Use contrast to show which information is important.
  • Use gestures to show which information is important.
  • Use your voice to show which information is important.

Prepare to give a short presentation to show your graphs.
  • Plan your gestures.
  • Plan your voice.
  • Plan your I. E. E. (introduce, explain, emphasize).
  • Practice! Practice! Practice!

Making Pie Graphs in Google Slides
You can review the slideshow to remember the lesson.


Model Presentation: Angela Duckworth
In her Ted Talk, Duckworth gave a very good presentation about grit. In her book, she talked about her secret. The secret was lots and lots and lots of practice. You can watch it again below.


Tuesday, September 4, 2018

Lesson 1 – Design and Posture

Task 1
Make a title slide and practice using contrast.
In your presentation software, open a new file.
Make a title slide with the following points.

  • Title
  • Subtitle
  • Name
  • Major or lab
  • School
  • Date

Use the CRAP principles to design your title slide.


Task 2

Make image slides. Use the techniques from the lesson:

  • Negative (white) space
  • Rule of thirds (1/3)
  • Bleeding (> 1024/768).


You can review the CRAP presentation and the Images presentation again below.


Task 3 (homework)

Make 4 graphs with data you have. Use the following kinds of graphs:

  • Vertical bar graph
  • Horizontal bar graph
  • Pie graph
  • Line graph

Be sure to use the right graph for your data. In the next lesson you should explain your graphs.


Task 4 (homework)

Update your first presentation. Use the design principles you learned for all of your slides. Practice your presentation again until you can deliver it smoothly.